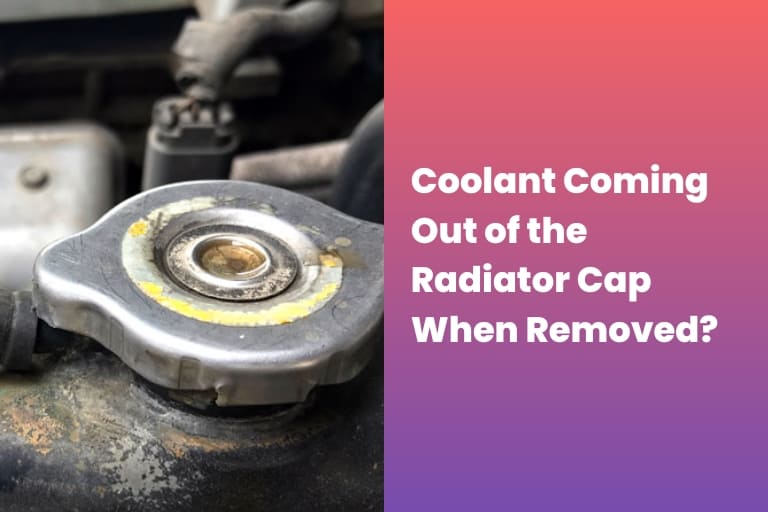
Hey there, car enthusiasts and concerned vehicle owners! Are you puzzled by why you see coolant gushing out when you remove the radiator cap? Trust me, you’re not alone, and yes, it’s something you shouldn’t ignore. This issue can be alarming and frustrating, especially if you’re not a mechanic whiz. It’s like your car is sending out an SOS, but what exactly is it trying to tell you?
Coolant leaking from the radiator cap could signal anything from a faulty water pump to a dreaded head gasket issue. Not only can these problems hit your wallet hard, but they can also cause your engine to overheat, diminishing both performance and gas mileage. So, whether it’s that temp gauge creeping up, a sweet smell coming from your engine, or the stress of seeing your coolant level drop, we’ve all been there, scratching our heads and asking, “What now?”
Stay tuned as we delve into the causes, symptoms, and solutions for coolant coming out of the radiator cap. Let’s troubleshoot this together and get your car running smoothly again!
Contents
The causes of coolant coming out of the radiator cap

If you’ve ever had the unsettling experience of coolant gushing out after removing the radiator cap, you’re probably keen on finding out the “why” behind the mess. Knowing the underlying causes can save you a trip to the mechanic and prevent further damage. Let’s explore.
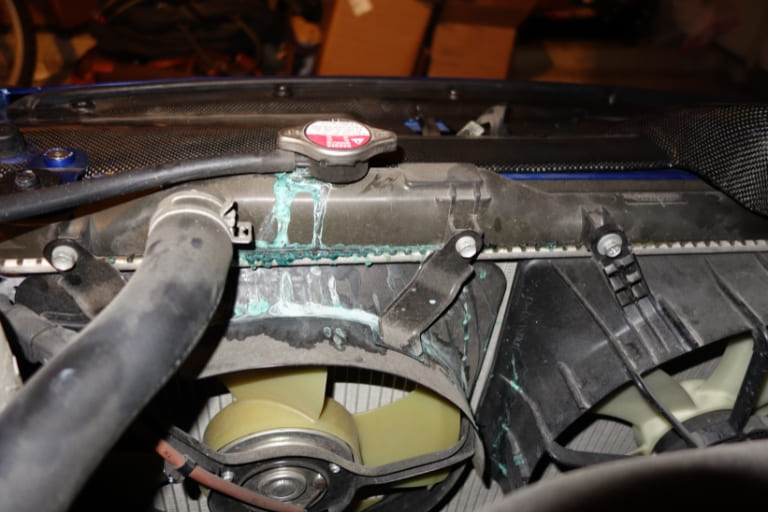
- Overpressure in the Coolant System: First, you need to know that your coolant system is designed to operate under a certain amount of pressure. When the pressure gets too high, it can force coolant to escape from the top of the radiator right out of the cap. This could be due to a malfunctioning radiator cap, not venting pressure properly or other system restrictions causing a build-up.
- Malfunctioning Radiator Cap: Your radiator cap isn’t just a lid; it’s a pressure valve designed to keep your cooling system operating efficiently. If faulty, it may fail to maintain the right pressure, causing coolant to leak out when you remove the radiator cap. So, don’t underestimate this little component; it plays a big role in ensuring everything runs smoothly.
- Faulty Head Gasket: If you have a leaky head gasket, that’s a more serious concern. A head gasket acts as a seal between your engine block and cylinder head. When it fails, coolant can mix with engine oil, ramping up the pressure in your coolant system and leading to that dreaded overflow.
- Overfilled Coolant System: Lastly, believe it or not, there’s such a thing as too much coolant. An overfilled system can result in excess pressure, leading to—yep, you guessed it—coolant leaking out when the cap is removed. Ensure you check the coolant level and fill it according to your vehicle’s guidelines.
Each of these issues requires immediate attention. Whether checking the pressure, inspecting your radiator cap, or giving that head gasket a thorough look-over, prompt action can save you from bigger headaches.
Symptoms of coolant leaking from the radiator cap
Knowing what to look for when you suspect coolant is leaking from your radiator cap can save you a whole heap of trouble down the line. Just like you wouldn’t ignore a fever if you were sick, your car has its telltale signs that something’s wrong. Let’s look at some of the most common symptoms that could point to this particular issue.
- Engine Overheating: This one’s a big red flag. When your cooling system isn’t doing its job, your engine is at risk of overheating. An overheating engine can lead to a domino effect of problems, including damage to essential components like the head gasket and cylinder head. Keep an eye on that temperature gauge!
- Low Coolant Level: If you’ve got coolant escaping from the radiator cap, chances are, your coolant level is taking a hit. Running low on coolant increases the risk of engine overheating and other performance issues. Don’t ignore that dipstick; ensure your coolant level is within the right range.
- White Smoke from Exhaust: Spotting white smoke billowing from your exhaust? That could mean your coolant is leaking into the combustion chamber. This is a critical issue that demands immediate attention. You don’t want to mess around when your engine practically sends smoke signals for help.
- That Sweet, But Troubling Smell: If you catch a whiff of something sweet yet somewhat chemical-like, that could leak the coolant you’re smelling. A quick check under the hood could confirm whether coolant is mixing with engine oil, which can lead to serious engine damage.
- Dashboard Warning Lights: Modern cars are smart; they tell you when something is wrong. If a warning light pops up on your dashboard related to coolant or temperature, don’t brush it off. Check your coolant level and refill if necessary.
- Reduced Engine Power: Finally, if your car just doesn’t have that usual ‘get up and go,’ it might struggle due to overheating caused by coolant leakage. Reduced engine power is not something to take lightly; it’s another sign that your engine isn’t operating at its best.
Each symptom is your car’s way of crying out for help. Listen to it. You’ll save yourself a lot of headaches (and, potentially, a lot of money) in the long run.
How to fix coolant coming out of radiator cap
Alright, so you’ve spotted the symptoms, and now you’re thinking, “How do I fix this coolant issue before my engine throws in the towel?” Well, you’re in luck because I’m going to walk you through it. Let’s turn that looming engine disaster into a minor hiccup, shall we?
Step 1: Properly Diagnose the Issue
The first step in our mission to fix the coolant coming out of the radiator cap is to diagnose the problem. A seasoned mechanic can do a thorough examination and tell you exactly what you’re up against. A diagnostic test could reveal issues ranging from a faulty thermostat to a cracked cylinder head. You need to know the root cause before diving into repairs.
Step 2: Check the Coolant Level
Open that hood and take a gander at the coolant reservoir. Your coolant level should be within the min-max markers on the side of the reservoir. If it’s not, it’s time to add coolant as specified by your vehicle’s manufacturer. Your engine can’t cool itself without enough of this vital fluid.
Step 3: Inspect the Radiator Cap
The prime suspect is your radiator cap. Give it a good once-over for any signs of damage, like cracks or wear. If it’s not up to snuff, replace it with a new one. Remember, a faulty radiator cap can’t maintain proper pressure in the cooling system, leading to all sorts of problems.
Step 4: Check for Leaks
Roll up those sleeves and get ready to play detective. Inspect the cooling system thoroughly. Look at hoses, gaskets, and even the water pump for any signs of leakage. If you find a leak, well, there’s your culprit. Repair it ASAP to stop coolant from taking an unauthorized exit.
Step 5: Examine the Head Gasket
The head gasket is another usual suspect when you’ve got coolant issues. A leaky or damaged head gasket could let coolant seep into the combustion chamber, manifesting as white smoke from your exhaust. You’d want to get this fixed, and fast.
Step 6: Check the Pressure
Use a cooling system pressure tester to check the pressure in your cooling system. An abnormal reading could mean your system is over-pressurized, causing coolant to gush out when you remove the radiator cap. Make adjustments as needed to keep that pressure in the green zone.
Step 7: Inspect the Thermostat
Last but certainly not least, give that thermostat a look. If it’s malfunctioning, it won’t regulate coolant flow properly, causing your engine to overheat. If necessary, replace the thermostat to ensure your engine operates at the optimal temperature.
Each of these steps plays a crucial role in making sure your engine stays cool and runs efficiently. It’s like a health check-up, but for your car. So get started, and may your coolant stay where it’s supposed to—inside the radiator and not on your garage floor!
How to prevent coolant from leaking out of the radiator cap again?
You’ve fixed the coolant issue from the radiator cap, so give yourself a pat on the back! But let’s be real—nobody wants a repeat performance. It’s time to think long-term and take preventive measures to ensure it doesn’t happen again. So, how do we keep that coolant where it belongs—inside the radiator? Let’s roll up our sleeves and dive in!
Stay Ahead with Regular Maintenance
First, you can’t ignore regular maintenance if you want to keep your cooling system in top-notch condition. That means consistently checking your coolant level, inspecting that radiator cap, and scanning for leaks. Trust me, the last thing you want is for that coolant to start a surprise gush-fest.
Stick to the Right Coolant
Not all coolants are created equal, folks! Always, and I mean ALWAYS, use the coolant recommended by your vehicle’s manufacturer. Substituting with the wrong coolant is like trying to fit a square peg in a round hole—it won’t end well and can lead to coolant leaks.
Freshen Up that Radiator Cap
If your radiator cap looks like it’s seen better days, don’t think twice—replace it. A worn or damaged cap can create a situation where coolant can be anywhere but in your radiator. So, a new cap can be a game-changer in avoiding future leaks.
Don’t Ignore Pressure Levels
High pressure in the coolant system can act like a volcano, making coolant overflow when you remove the radiator cap. Get that pressure checked and make sure it’s not going overboard.
Keep an Eye on the Head Gasket
Your head gasket is like the guardian angel of your cooling system. If it’s damaged, you could see coolant entering the combustion chamber. That’s bad news, bears! So, regular inspections can save you from headaches later on.
Thermostat Health Check
A faulty thermostat can make your engine overheat. And when engines overheat, guess what? Yep, coolant can start leaking out. Make sure your thermostat is doing its job correctly to keep things cool and contained.
Lights On, Problems Off
Your dashboard isn’t just for show; it’s your early warning system. If you see those caution lights flare up, don’t ignore them. Keeping your coolant levels in check will go a long way in preventing future leaks from the radiator cap.
Regular Visits to the Mechanic
Lastly, don’t underestimate the power of a good mechanic. Regular servicing can catch potential issues before they become big, expensive problems. Think of it as a wellness check for your car’s cooling system.
By following these guidelines, you’re not just fixing a problem—you’re fortifying your cooling system against future issues. And that’s what being a responsible car owner is all about!
Also, Check the following:
- 9 Signs You Need a Coolant Flush
- Can Low Coolant Level Cause a Check Engine Light?
- Why Is the Air Compressor Pushing Coolant Out?
- Coolant Under Pressure When Cold
- Does the Coolant Level Drop When The Engine Is Cold?
- Coolant Coming Out of the Overflow
- Can You Put Ice in Your Coolant?
- What Happens if You Don’t Flush Coolant?
- Can Coolant Flush Cause Leaks?
- No Coolant in the Radiator, but Reservoir Tank is Full
- Do Cars Lose Coolant Over Time?
- Does Coolant Evaporate?
- Is Inverter Coolant the Same as Engine Coolant?
Conclusion
In conclusion, preventing coolant from leaking from your radiator cap is all about proactive care and vigilance. Regular maintenance checks can help you spot issues early while using the correct coolant minimizes the risk of damage to your cooling system. Don’t skimp on replacing an old or damaged radiator cap; it’s a simple fix that can avert messy spills. Keep tabs on the pressure in the system and ensure your head gasket and thermostat are in good working order to avoid overheating and unwanted coolant overflow. Pay attention to those dashboard caution lights, and make frequent trips to a trusted mechanic for routine checks.
By staying ahead of these key areas, you’re not just plugging a leak—you’re ensuring the overall health of your vehicle’s cooling system.
References: